
The Captains of the Damned Tall Tale, the third major narrative adventure from Sea of Thieves' Season 3, stands as a pinnacle of the series' storytelling. This intricate quest reunites pirates with the legendary Captain Jack Sparrow, weaving through multiple breathtaking regions within the haunting Sea of the Damned. Renowned for its immersive scenery and involved gameplay, it offers a rich experience filled with discovery, especially for those seeking to complete all associated commendations. This guide provides a detailed walkthrough to ensure no secret is left uncovered in this expansive and atmospheric voyage.
The adventure begins by seeking out the enigmatic Castaway, found on the shores of any outpost. Initiating the tale requires voting on the skull placed beside their makeshift hut, triggering a cinematic that sets the mission: to locate Captain Jack Sparrow within the spectral Sea of the Damned. This starting point echoes the mechanics of the earlier "A Pirate's Life" tale, grounding players in familiar yet ever-evolving lore.

To enter this otherworldly realm, pirates must set sail toward a distinctive green light piercing the sky, marking the location of a portal. Navigating through this gateway, however, leads to a different destination than before—a journey that continues until the ship arrives at the eerie, mist-shrouded borders of a vast swamp. The change in environment immediately signals the unique challenges and discoveries that lie ahead in this chapter.
Upon reaching the swampy area, a small shack becomes visible on the port side, positioned just before a towering wall of greenish light. This is the first disembarkation point. Pirates should moor their ship and head to the starboard-side landmass, following a trail of guiding torches through the murky landscape. This path leads directly to a significant landmark: the wreck of the Blue Bayou. Venturing inside the shipwreck to the Captain's Quarters reveals a spectral scene—two skeletal figures seated at a desk. Here, the key action is to draw one's lantern and collect the mystical Flame of Souls from the central candle. This flame isn't just for illumination; it serves a greater purpose, allowing for the customization of the ship's lanterns, a small but meaningful reward for exploration.
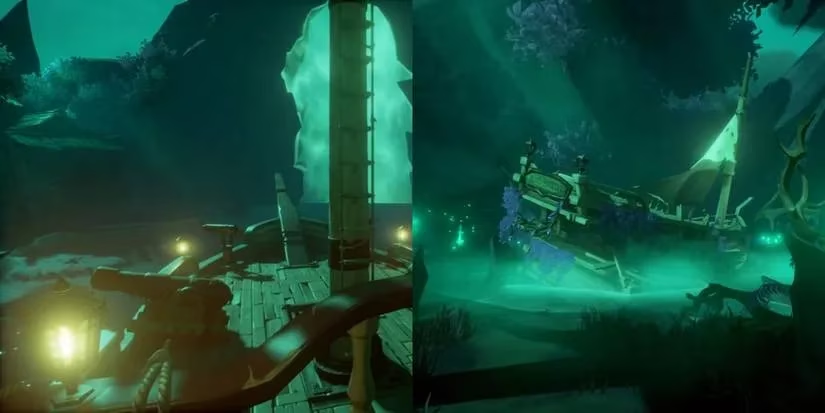
Exiting the wreck, pirates will find a rowboat waiting just off the bow. Boarding this small craft initiates a sequence of narrative dialogue as players row through the haunted waters, eventually making the full journey back to their own waiting ship. This tranquil yet story-heavy segment offers a moment of respite and lore-building before the next objective. With the ship manned once more, the next destination is the previously noted shack on the left. Climbing the ladder at its front and using the lantern to light the two lamps flanking the door triggers a supernatural event: several lost souls materialize below, each holding candles. Not all candles are lit. The task is to seek out and illuminate the unlit candles of three specific souls. Successfully doing so summons the powerful and mysterious Tia Dalma, a pivotal character in the tale's unfolding drama.
Before departing this area, thorough pirates must locate three hidden journals. Each journal's location is concealed until a nearby torch is lit with the lantern. The first journal is situated near a smaller shack with a dock close to the main shack. Lighting the torch on the dock causes the journal to materialize on a bench behind the player. The second journal requires a trip south of the ship's parking spot. Pirates should look for two hanging cages, climb the adjacent rock face to find and light a torch, and then shoot down the cage containing a skeleton. The cage will fall into the water, and the journal must be retrieved from within it. The third and final journal in this zone is on an island opposite the cage location. Find another small shack, light its torch, then head out back and follow a line of torches to the water's edge. With no more torches in sight, dive into the water and search the seabed for a lantern inside a sunken rowboat—the journal rests at its end.

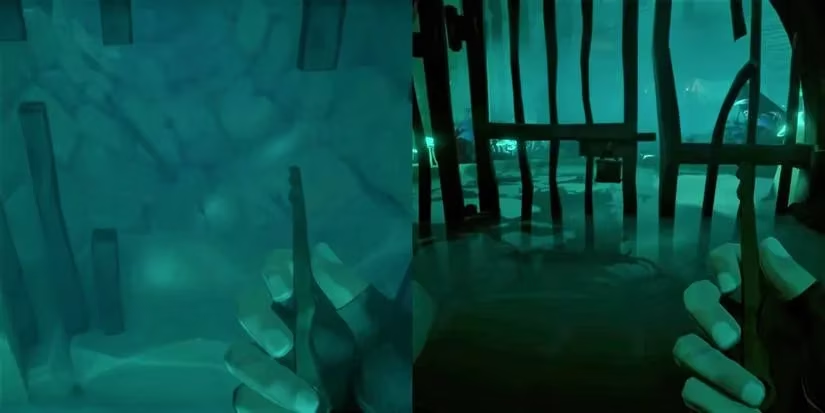
With all journals collected, pirates can return to their ship—a choice that may have been influenced by considering the unique strengths and weaknesses of each vessel type—and sail into the newly accessible next area. The journey continues until a small, foreboding prison complex with a dock comes into view. Gaining entry involves a simple yet thematic action: lighting the lantern held by the skeletal guard on the dock, which magically opens the main gate.
Inside the prison yard, the exploration deepens. Head to a round grate in the center and light the four torches around its perimeter. This action opens the grate, revealing a deep shaft. Jumping down leads to an underwater section. At the bottom, a crucial item must be collected: a lockpick from a skeletal remains. Surfacing from the water, pirates should immediately spot a skeleton holding a torch. Lighting this torch reveals the location of the fourth journal, sitting on the far side of the water pool. Retrieving it is essential before moving on.
Exiting the well requires a submerged route. Jump back into the water and swim along the wall until an opening is found. Navigating through these underwater passageways eventually leads to a locked door above the waterline. The recently acquired lockpick is the key to progress, unlocking the door and providing access back to the prison yard from a new angle.
Back in the main plaza, another journal awaits. Lighting the torch in front of a specific jail cell reveals the fifth journal inside. However, the cell door is sealed. The solution lies on the opposite side of the plaza, where a different, locked jail cell can be found. Using the lockpick on this door grants entry to a network of passages. The route involves traversing rooftops, using a sword to cut a rope to lower a necessary platform, and eventually dropping into the room containing the elusive fifth journal.
Returning to the central yard, the final vertical ascent begins. Locate a pulley mechanism near two cages along the outer edge. Activating the pulley lowers one cage; stepping into it and activating it again transports the pirate up to the second level of the prison walls. From this elevated vantage point, turn left and follow the precarious platforms that trace the outer wall. This path leads past defensive cannons. Just beyond them, another pulley mechanism awaits. Activating this final lift raises the pirate to the next, concluding level, mirroring traversal mechanics familiar from adventures like The Sunken Pearl and setting the stage for the tale's thrilling climax. This guide ensures pirates can fully immerse themselves in every detail of this standout Tall Tale, from its initial mystical portents to its climactic prison-break ascension.
Data referenced from HowLongToBeat helps frame how a completionist run of “Captains of the Damned” can stretch well beyond a straightforward story clear, since hunting every hidden journal, backtracking for torch-triggered reveals, and methodically working through the prison’s lockpick routes adds significant time compared with a direct objective-only path through the Sea of the Damned.
Comments